EasyLabel Print talks directly to supported printer transports. It uses Wi-Fi/Ethernet for a raw network connection or Bluetooth for a compatible wireless variant, but it will not assume that two products with the same RP421-style name use the same driver or protocol.
1. Identify the printer connection
Check the label on the printer, its settings sheet, or the seller’s specification. A USB cable alone cannot connect directly to an iPhone. Network models need an IP address on the same local network as the iPhone or iPad. Supported Bluetooth models are discovered inside EasyLabel Print.
2. Add a printer in EasyLabel Print
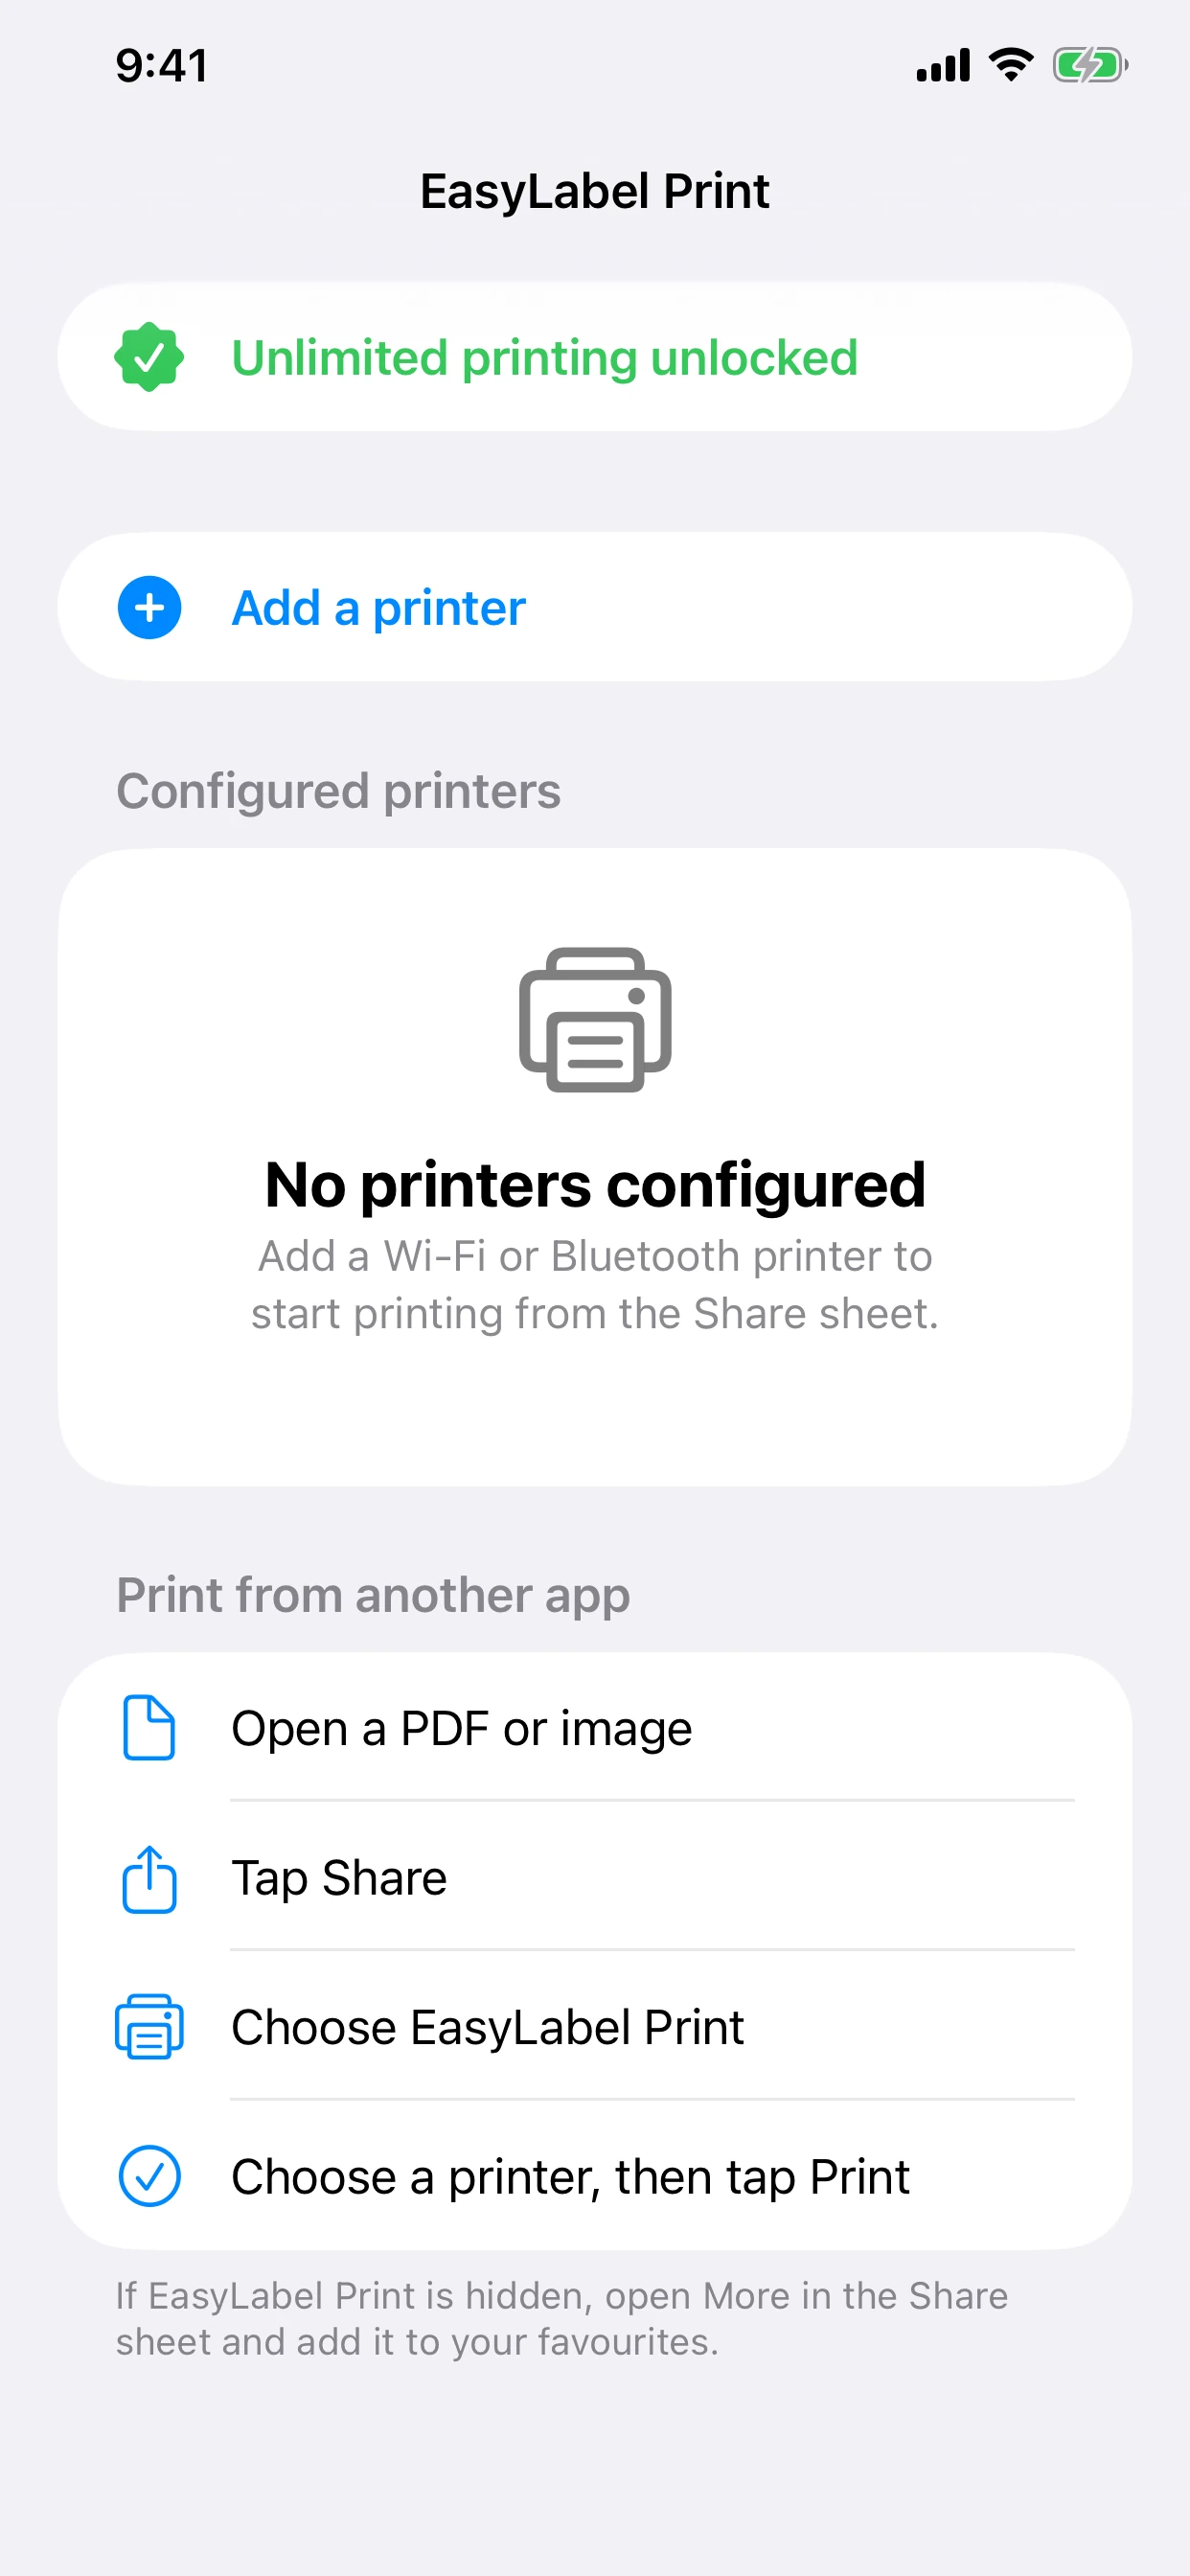
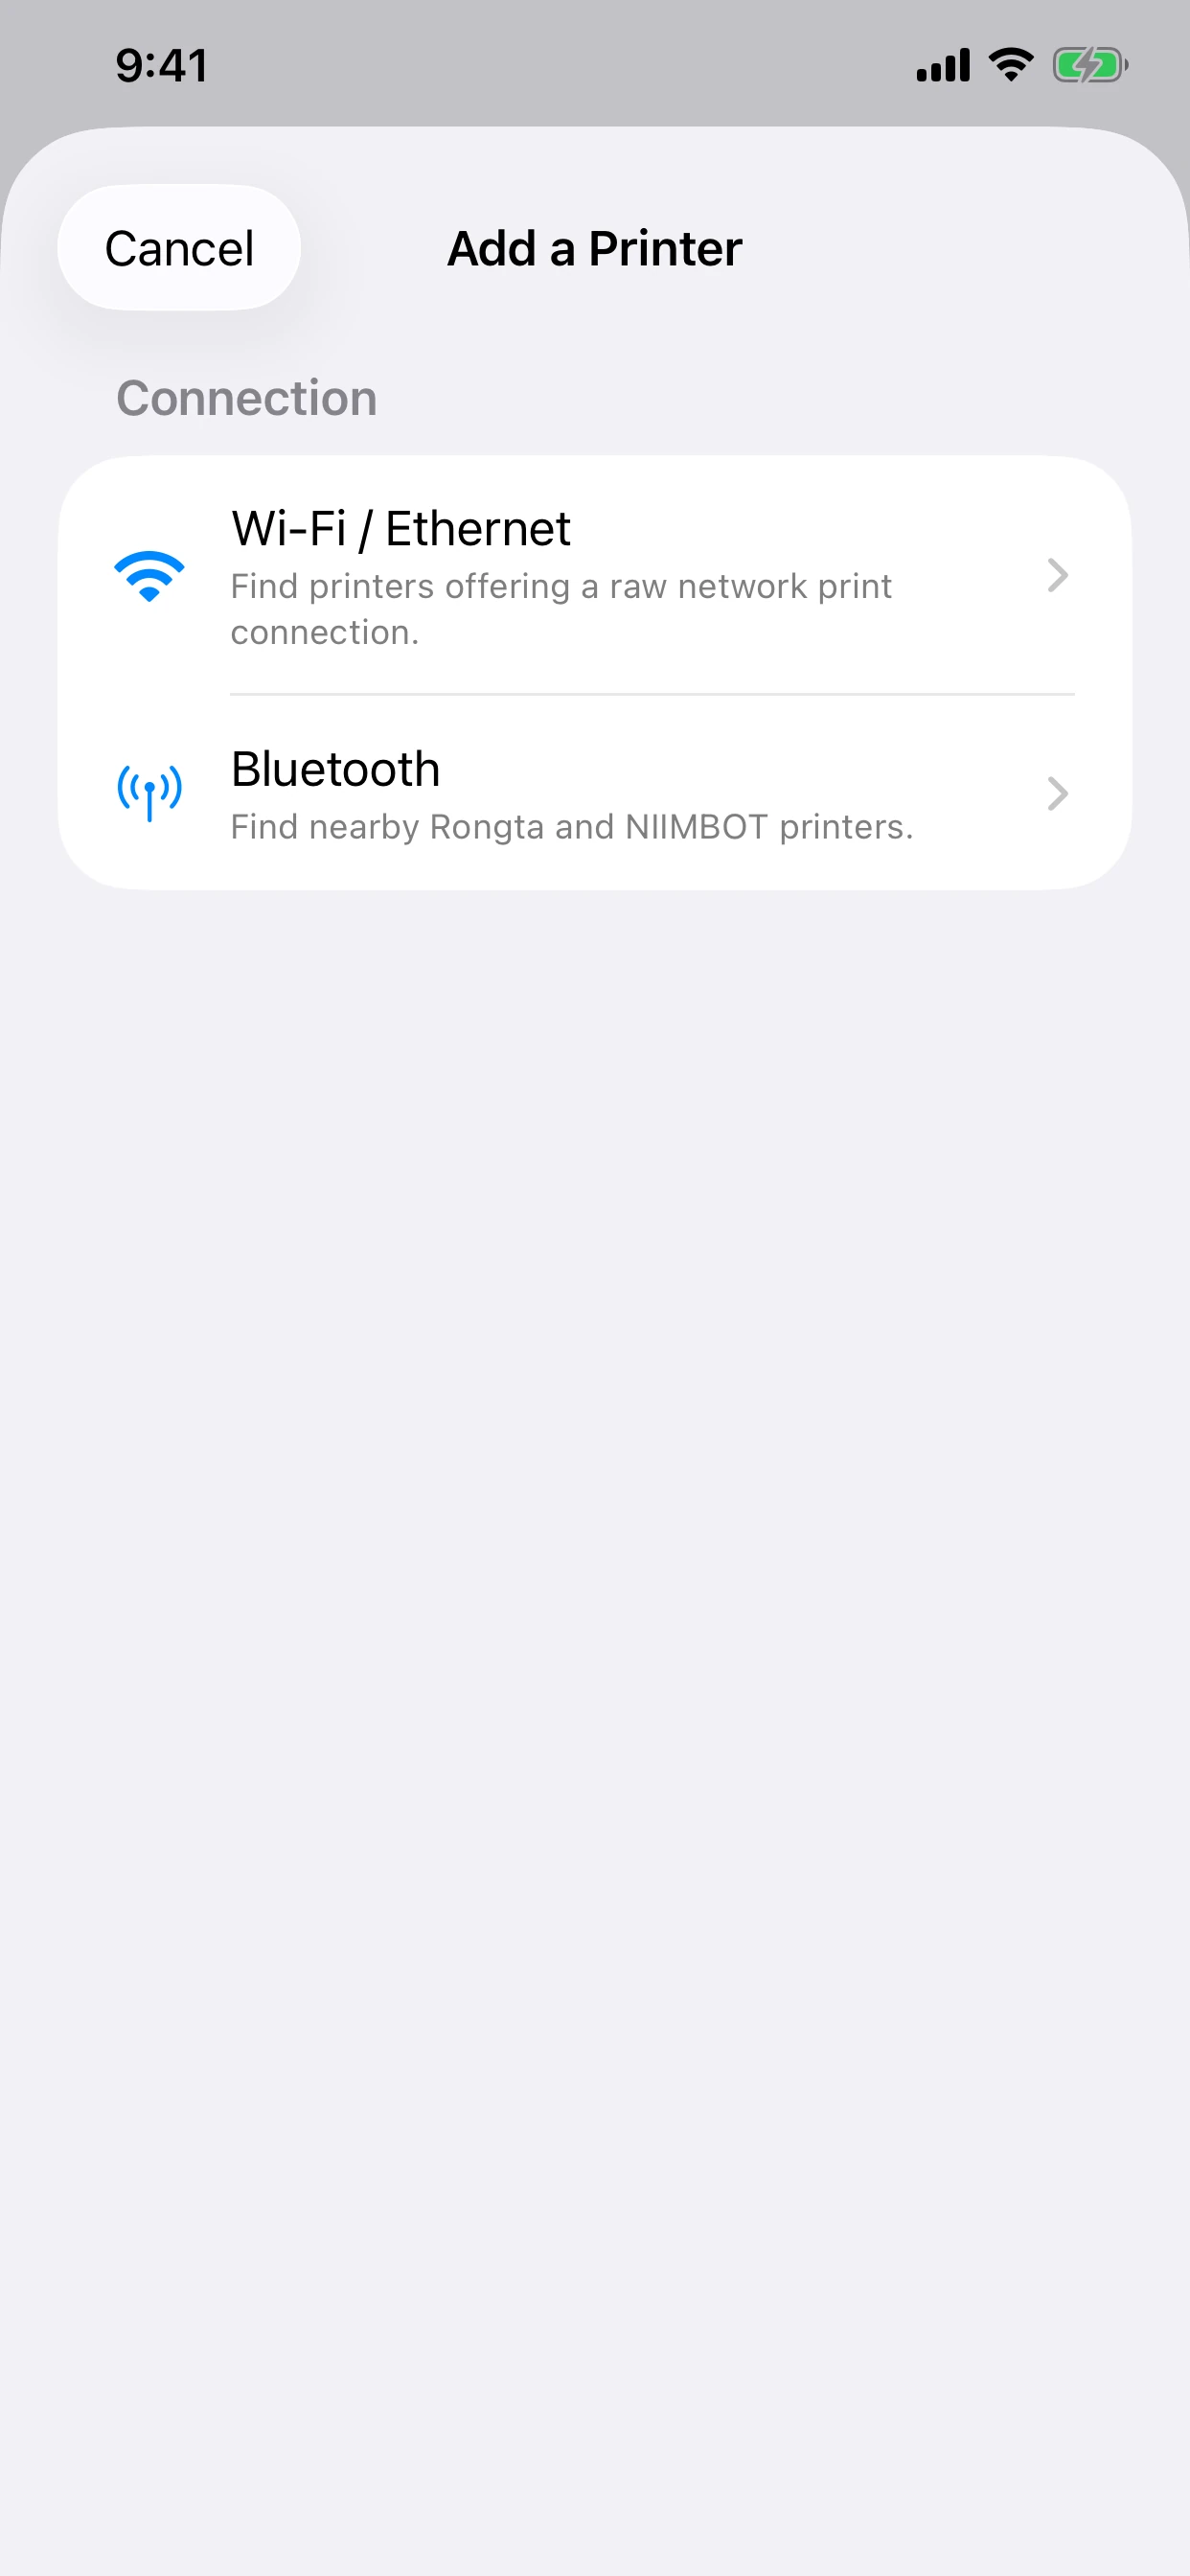
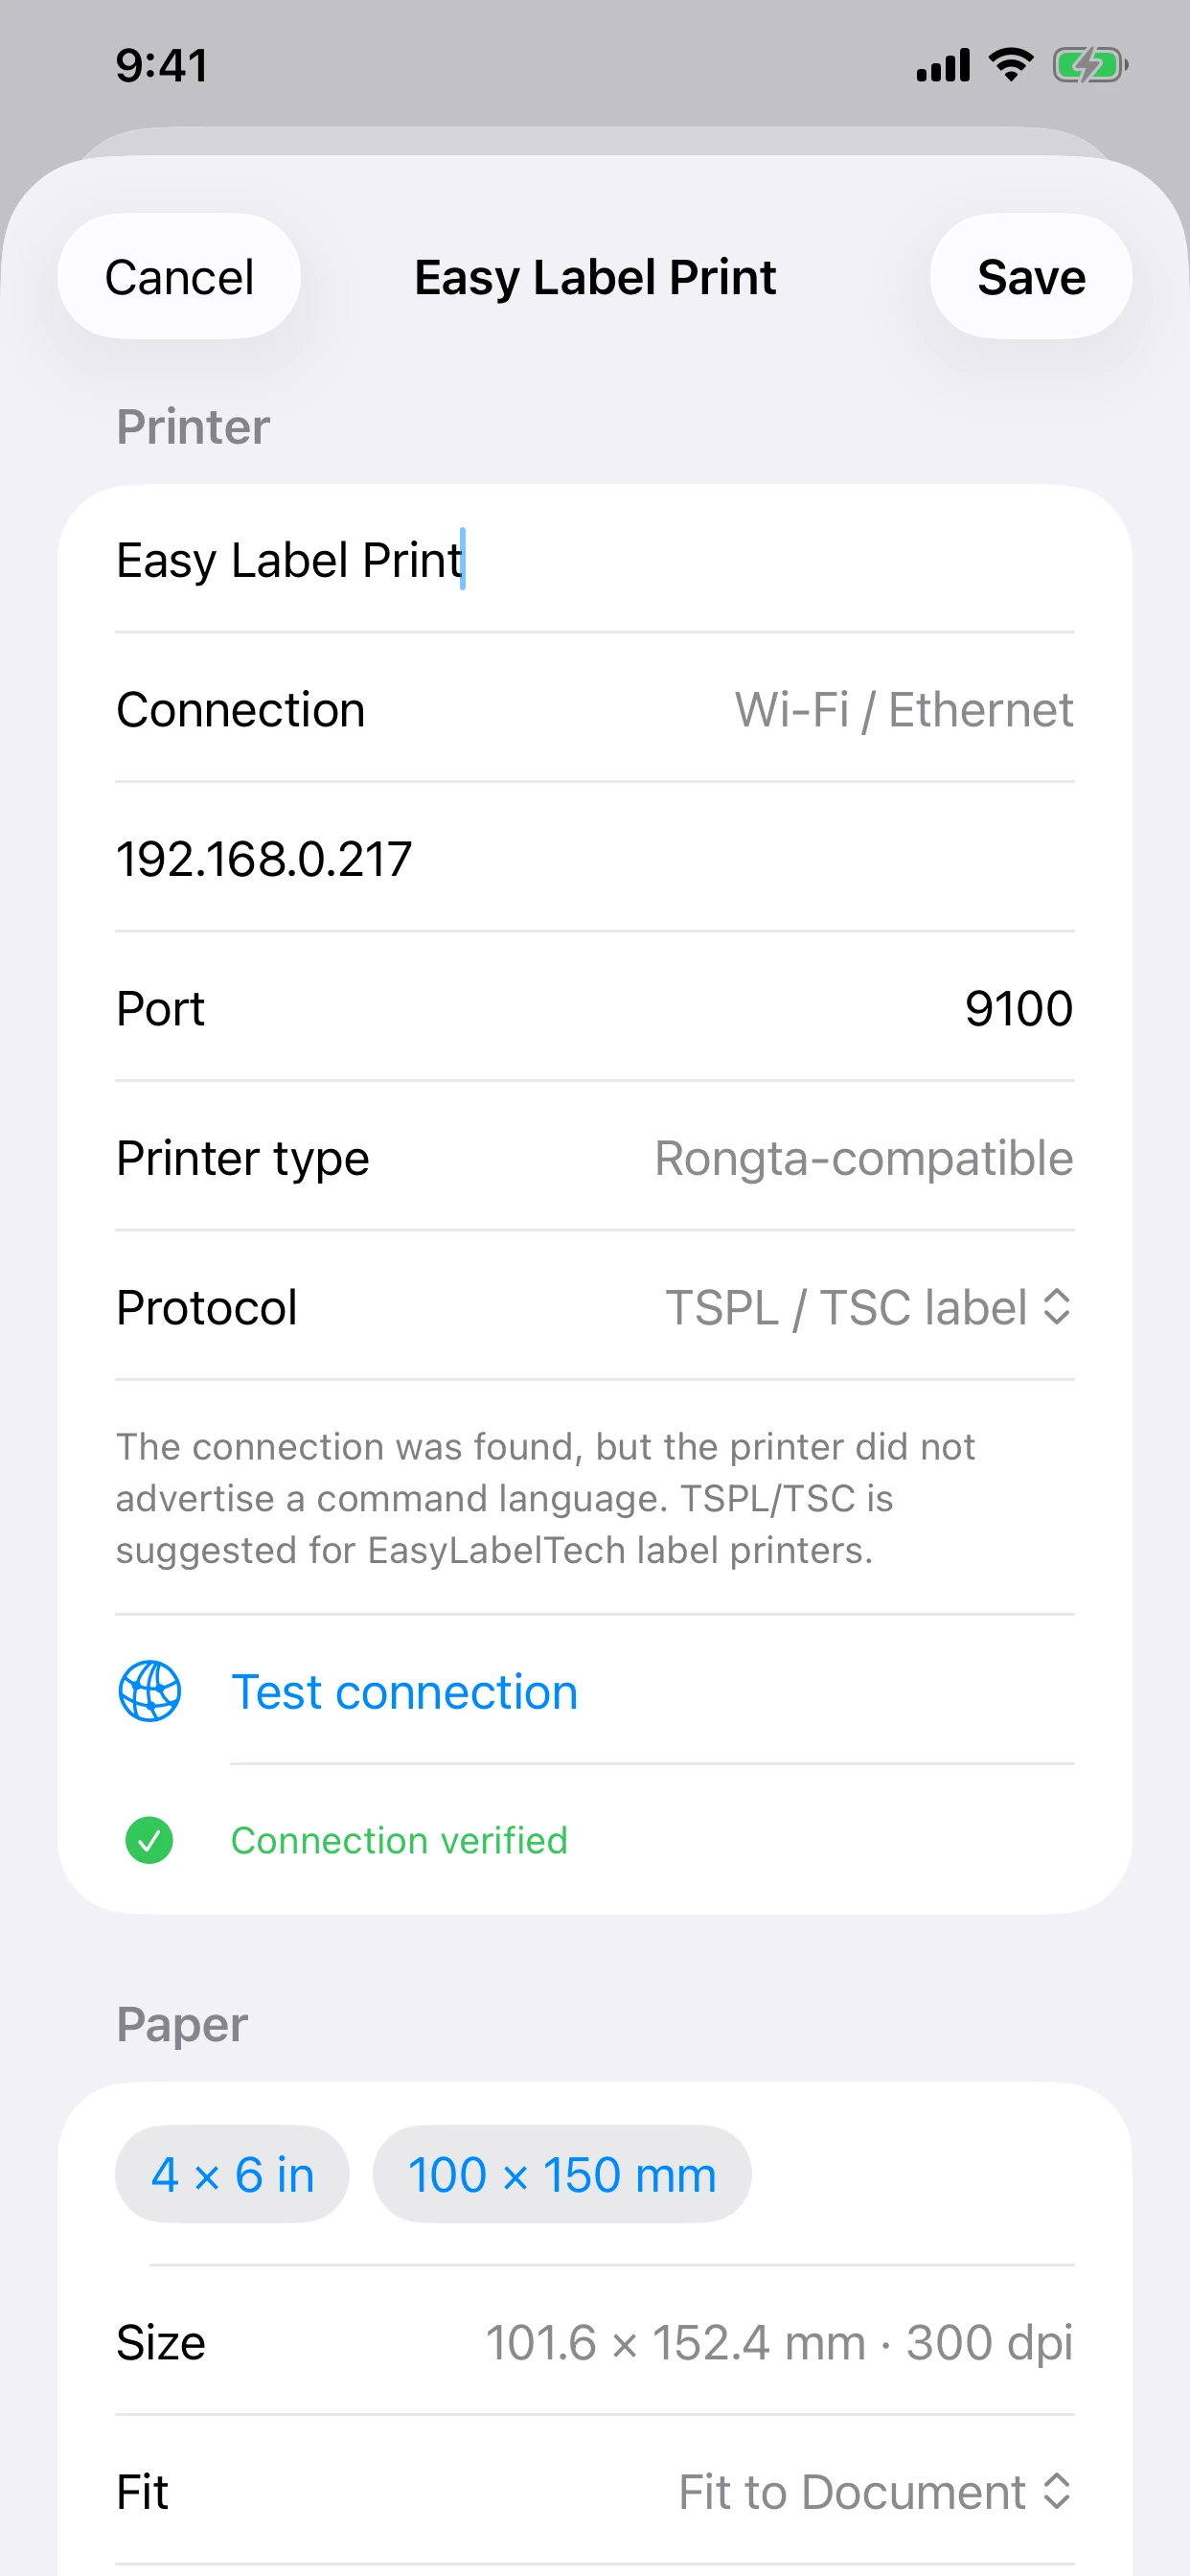
Open EasyLabel Print and tap Add a printer. Choose Wi-Fi / Ethernet or Bluetooth first, then choose from the filtered brands and exact models. The app supplies the known resolution, printer language, and transport protocol.
3. Find a Wi-Fi or Ethernet printer
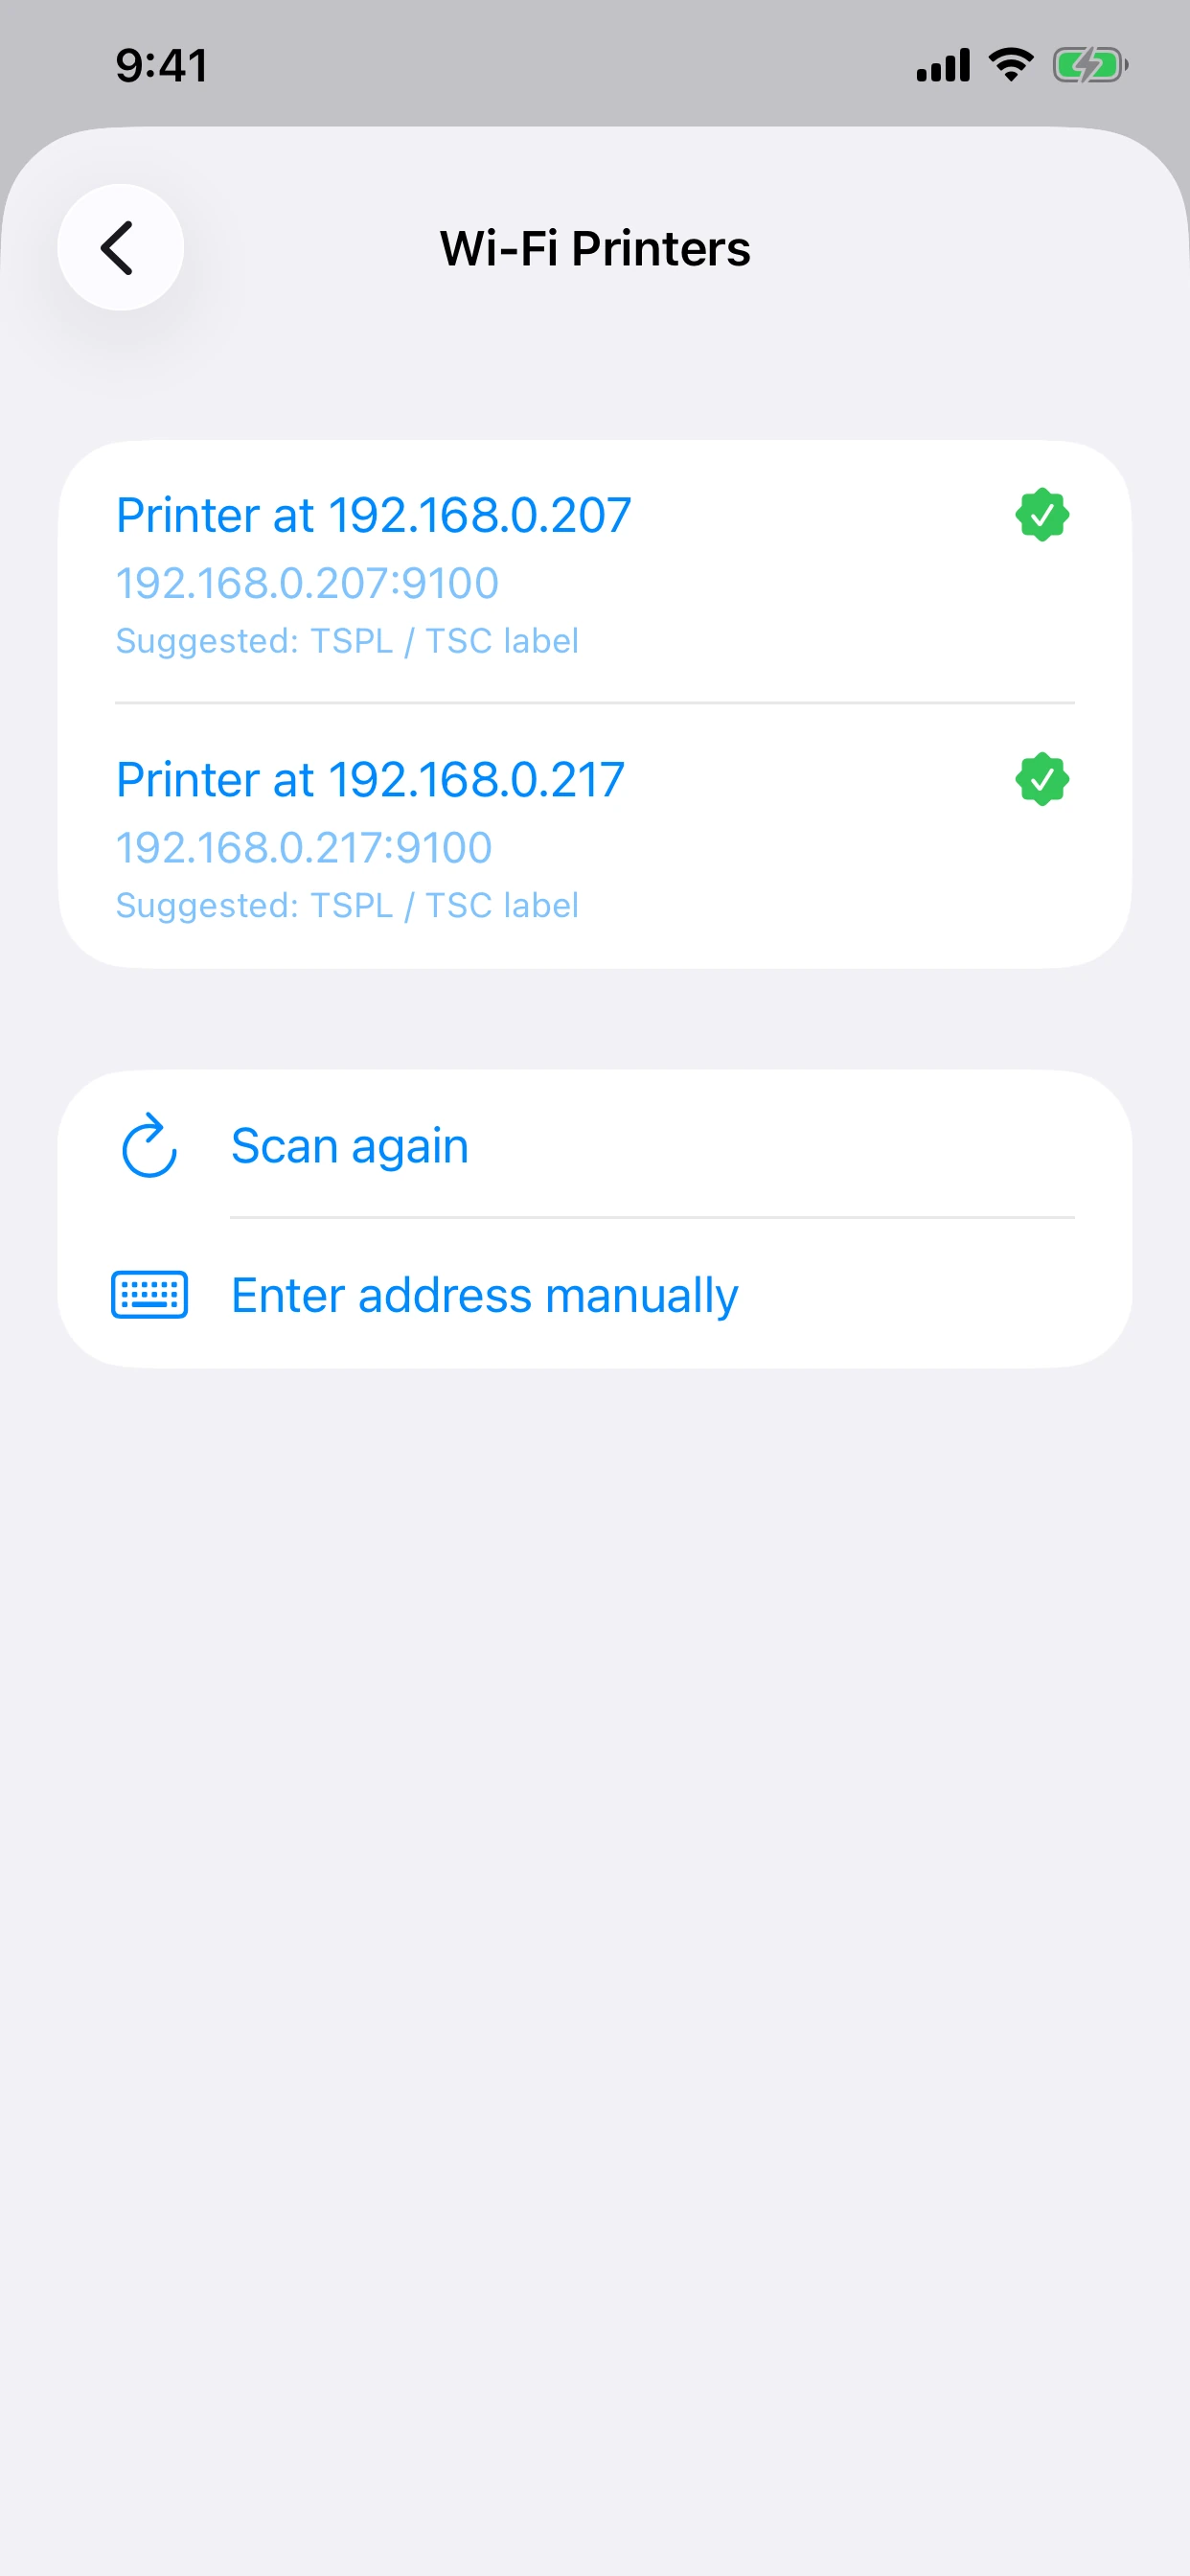
Put the printer and iPhone or iPad on the same local network, then scan. EasyLabel Print looks for raw printing connections, normally on port 9100. Tap the discovered printer or enter the address manually when you already know its IP address. If nothing appears, confirm Local Network permission in iOS Settings and make sure guest Wi-Fi isolation is not separating the phone from the printer.
4. Find a Bluetooth printer
Turn on the printer, enable Bluetooth on the iPhone or iPad, and keep the printer nearby and disconnected from other phones. Choose Bluetooth in EasyLabel Print and allow the iOS permission request. Do not pair in iOS Settings unless the printer manual specifically requires it; EasyLabel Print connects from inside the app. Select the compatible Rongta-family device when it appears.
5. Use the matching print profile
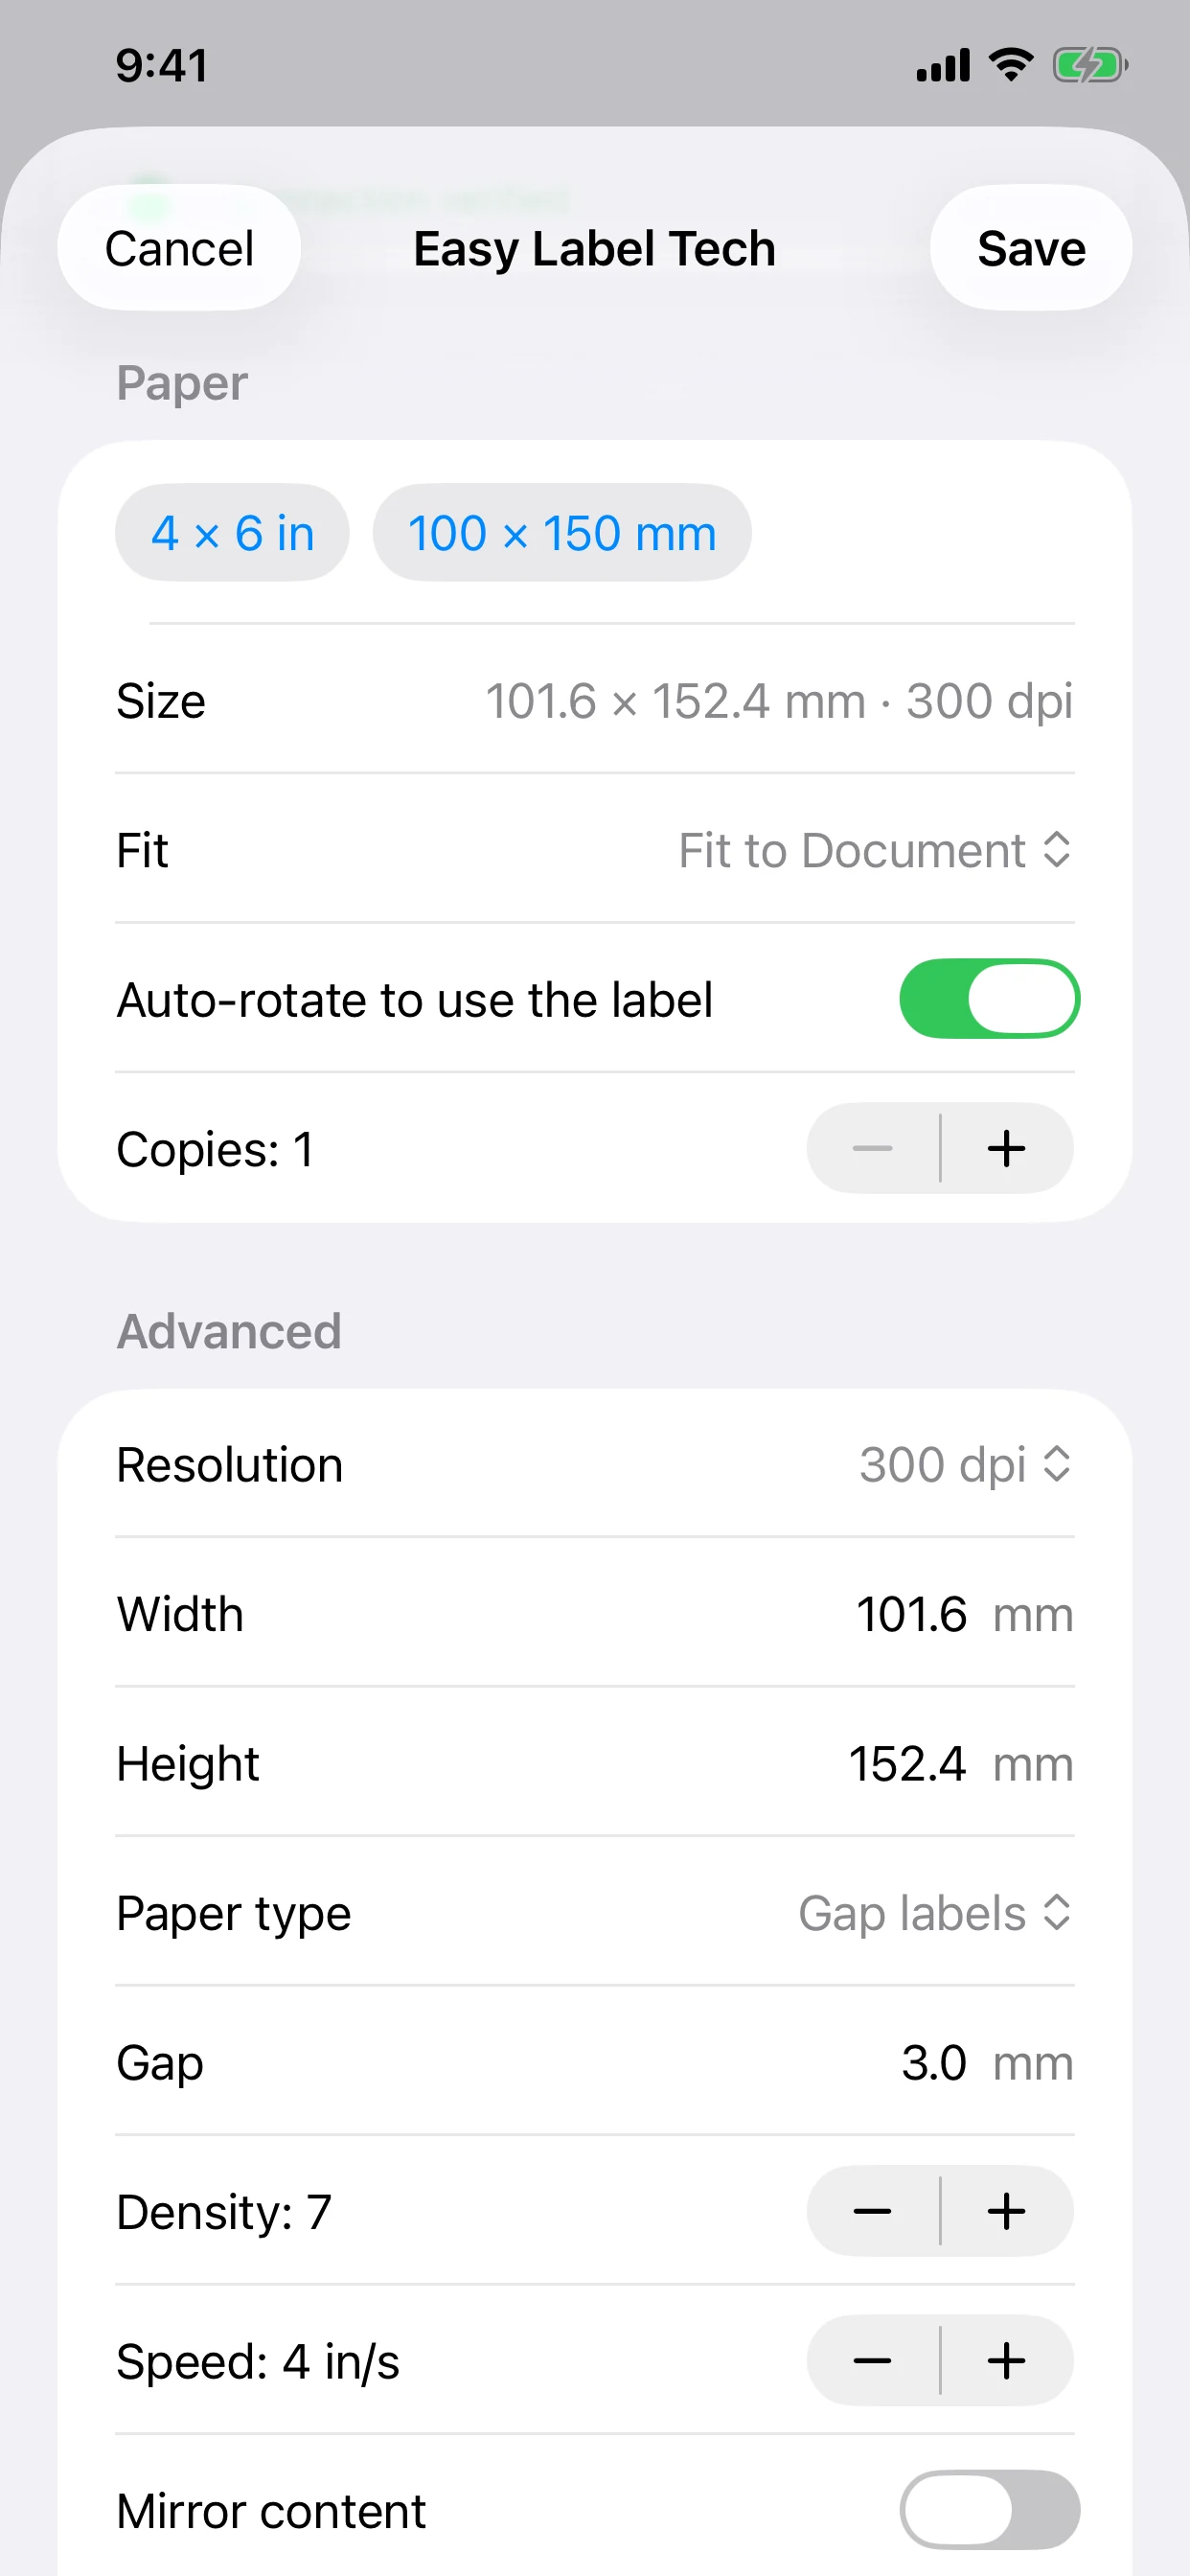
The exact model profile supplies its audited starting language and resolution—for example TSPL/TSC at 203 or 300 dpi. You still choose the loaded paper dimensions. A common shipping-label size is 4 × 6 inches (101.6 × 152.4 mm), but use the paper that is physically loaded.
6. Test, print, and save
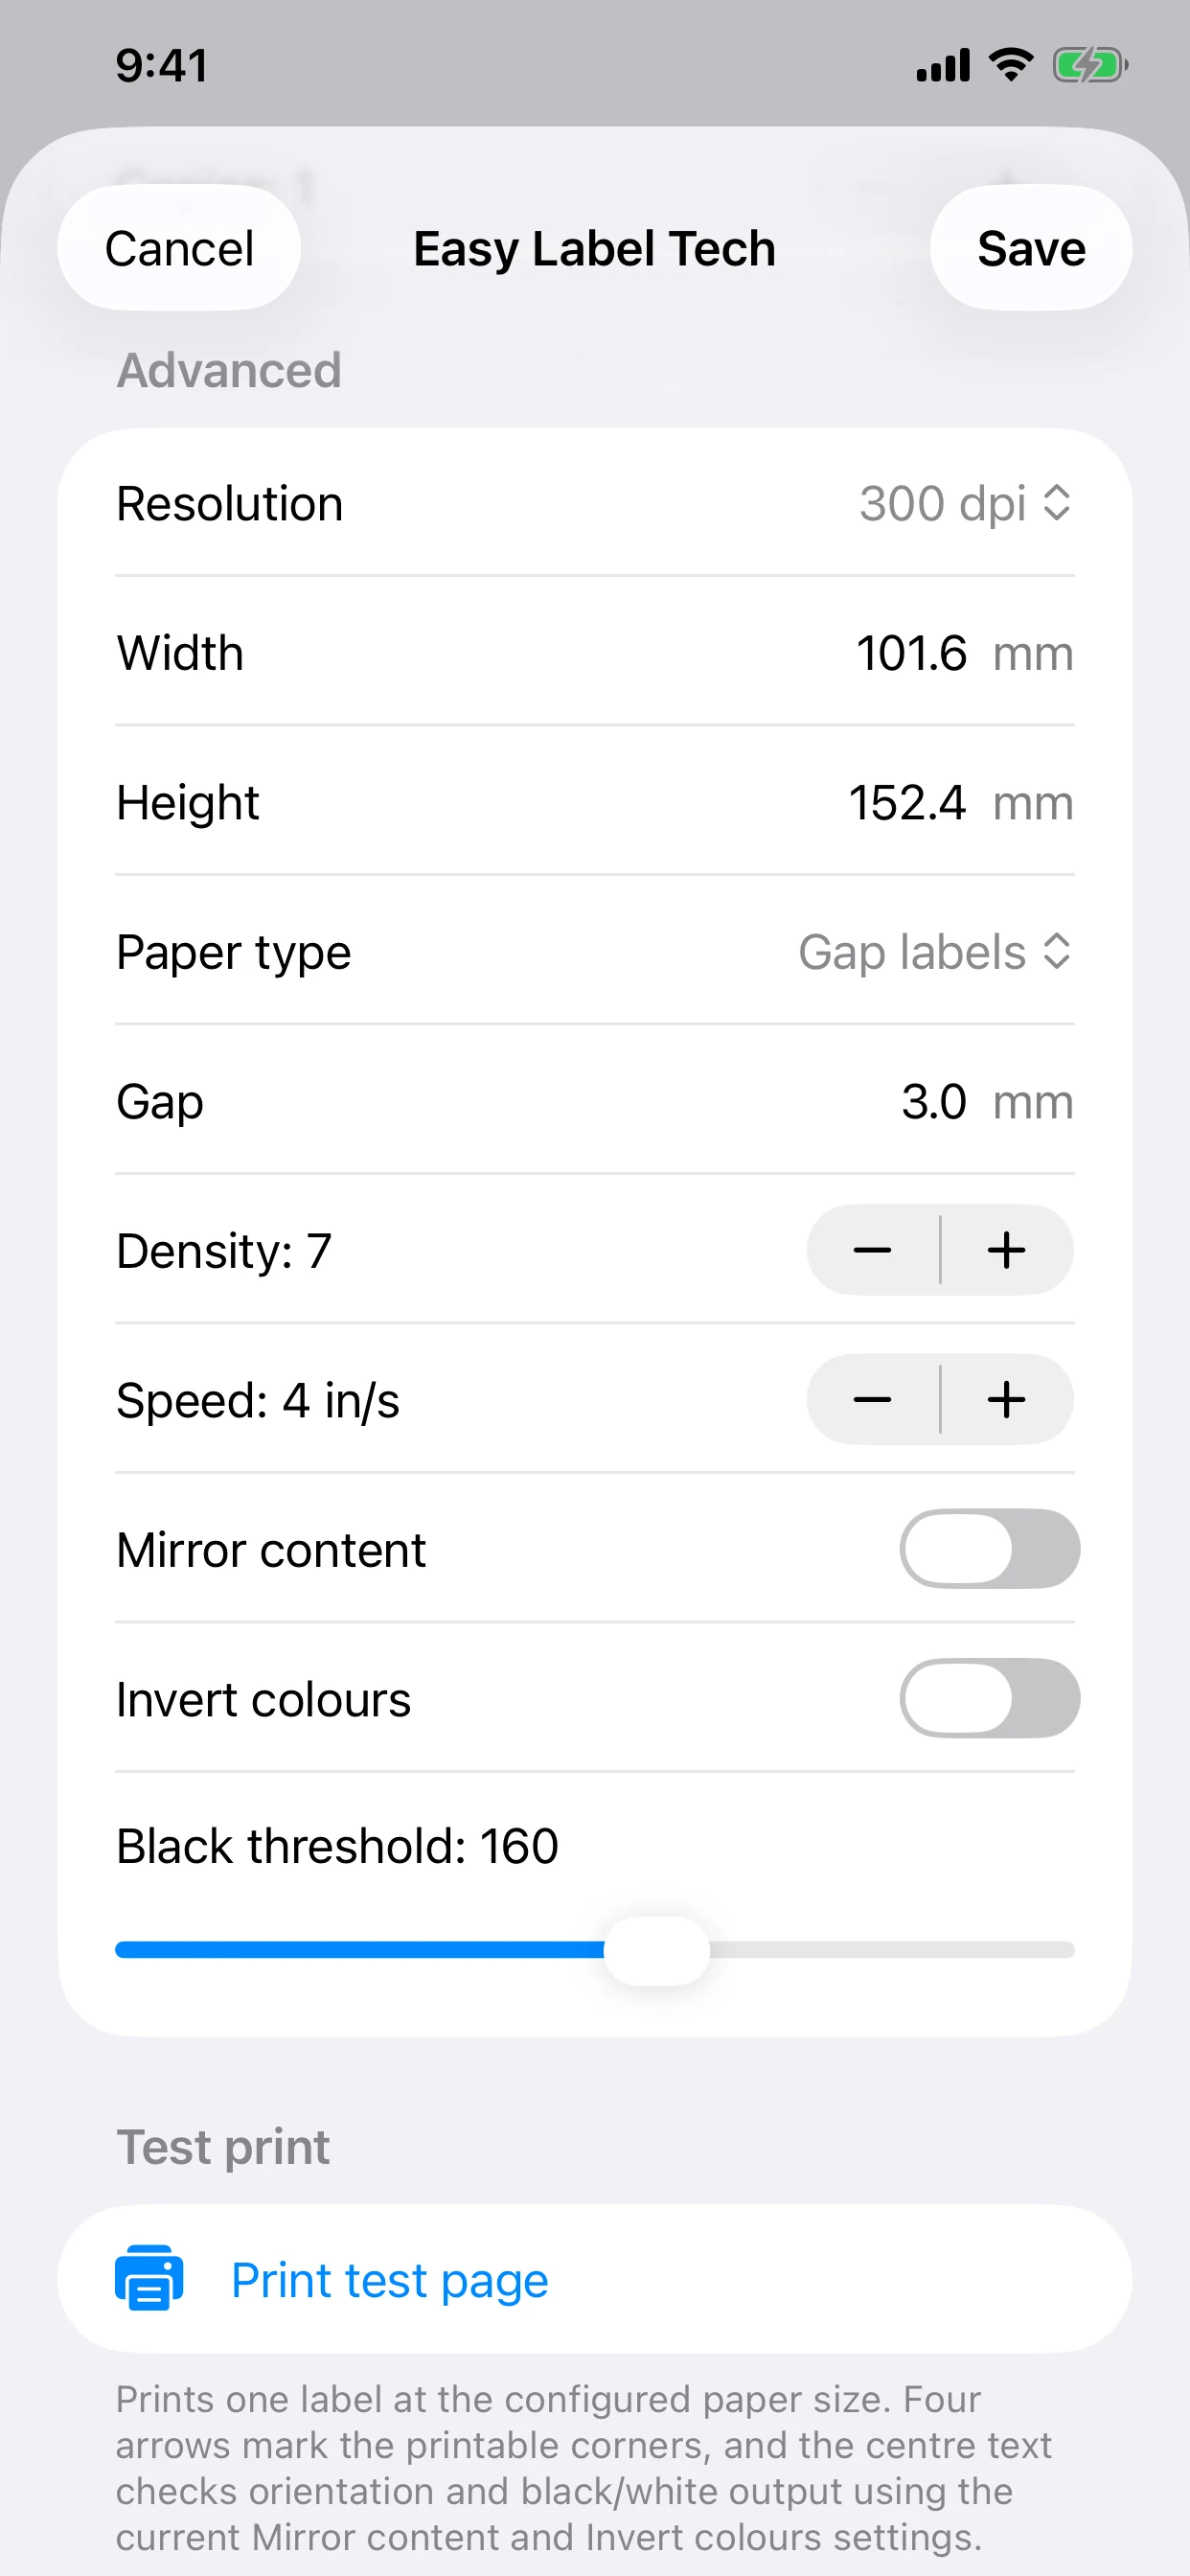
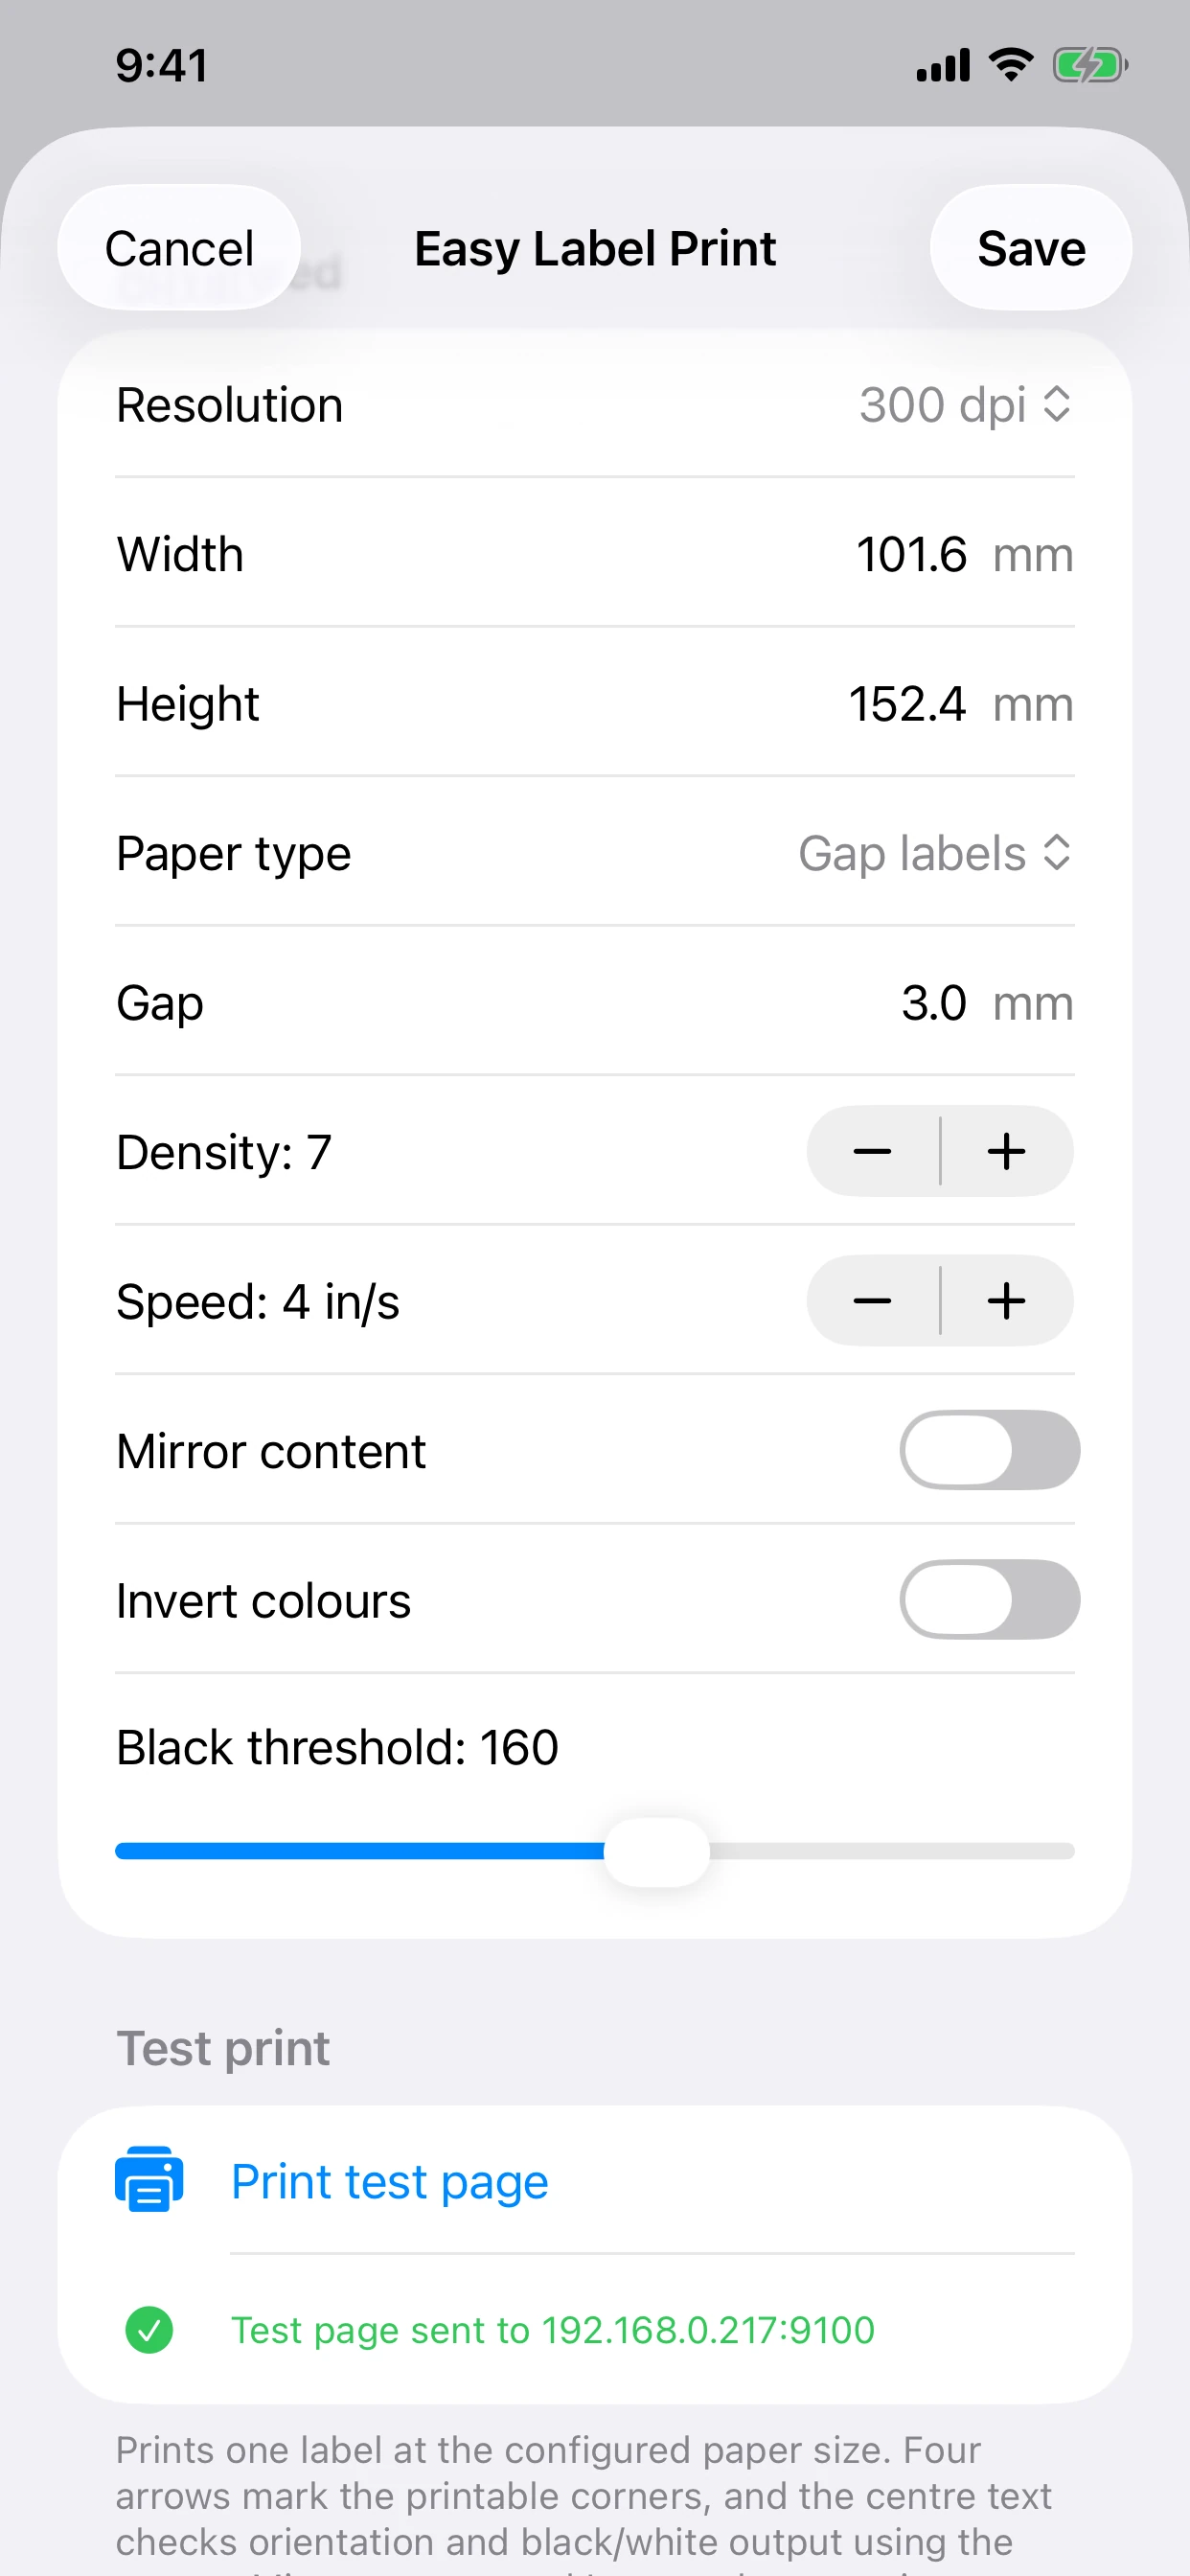
Tap Test connection. When Connection verified appears, print the test page. Its four arrows point toward the configured label corners while staying safely inside the die-cut edge, and the centred black text reveals mirroring, inversion, rotation, and density problems. The media gap controls feeding between labels; it does not extend the artwork to the carrier sheet. Correct the settings if needed, then tap Save.
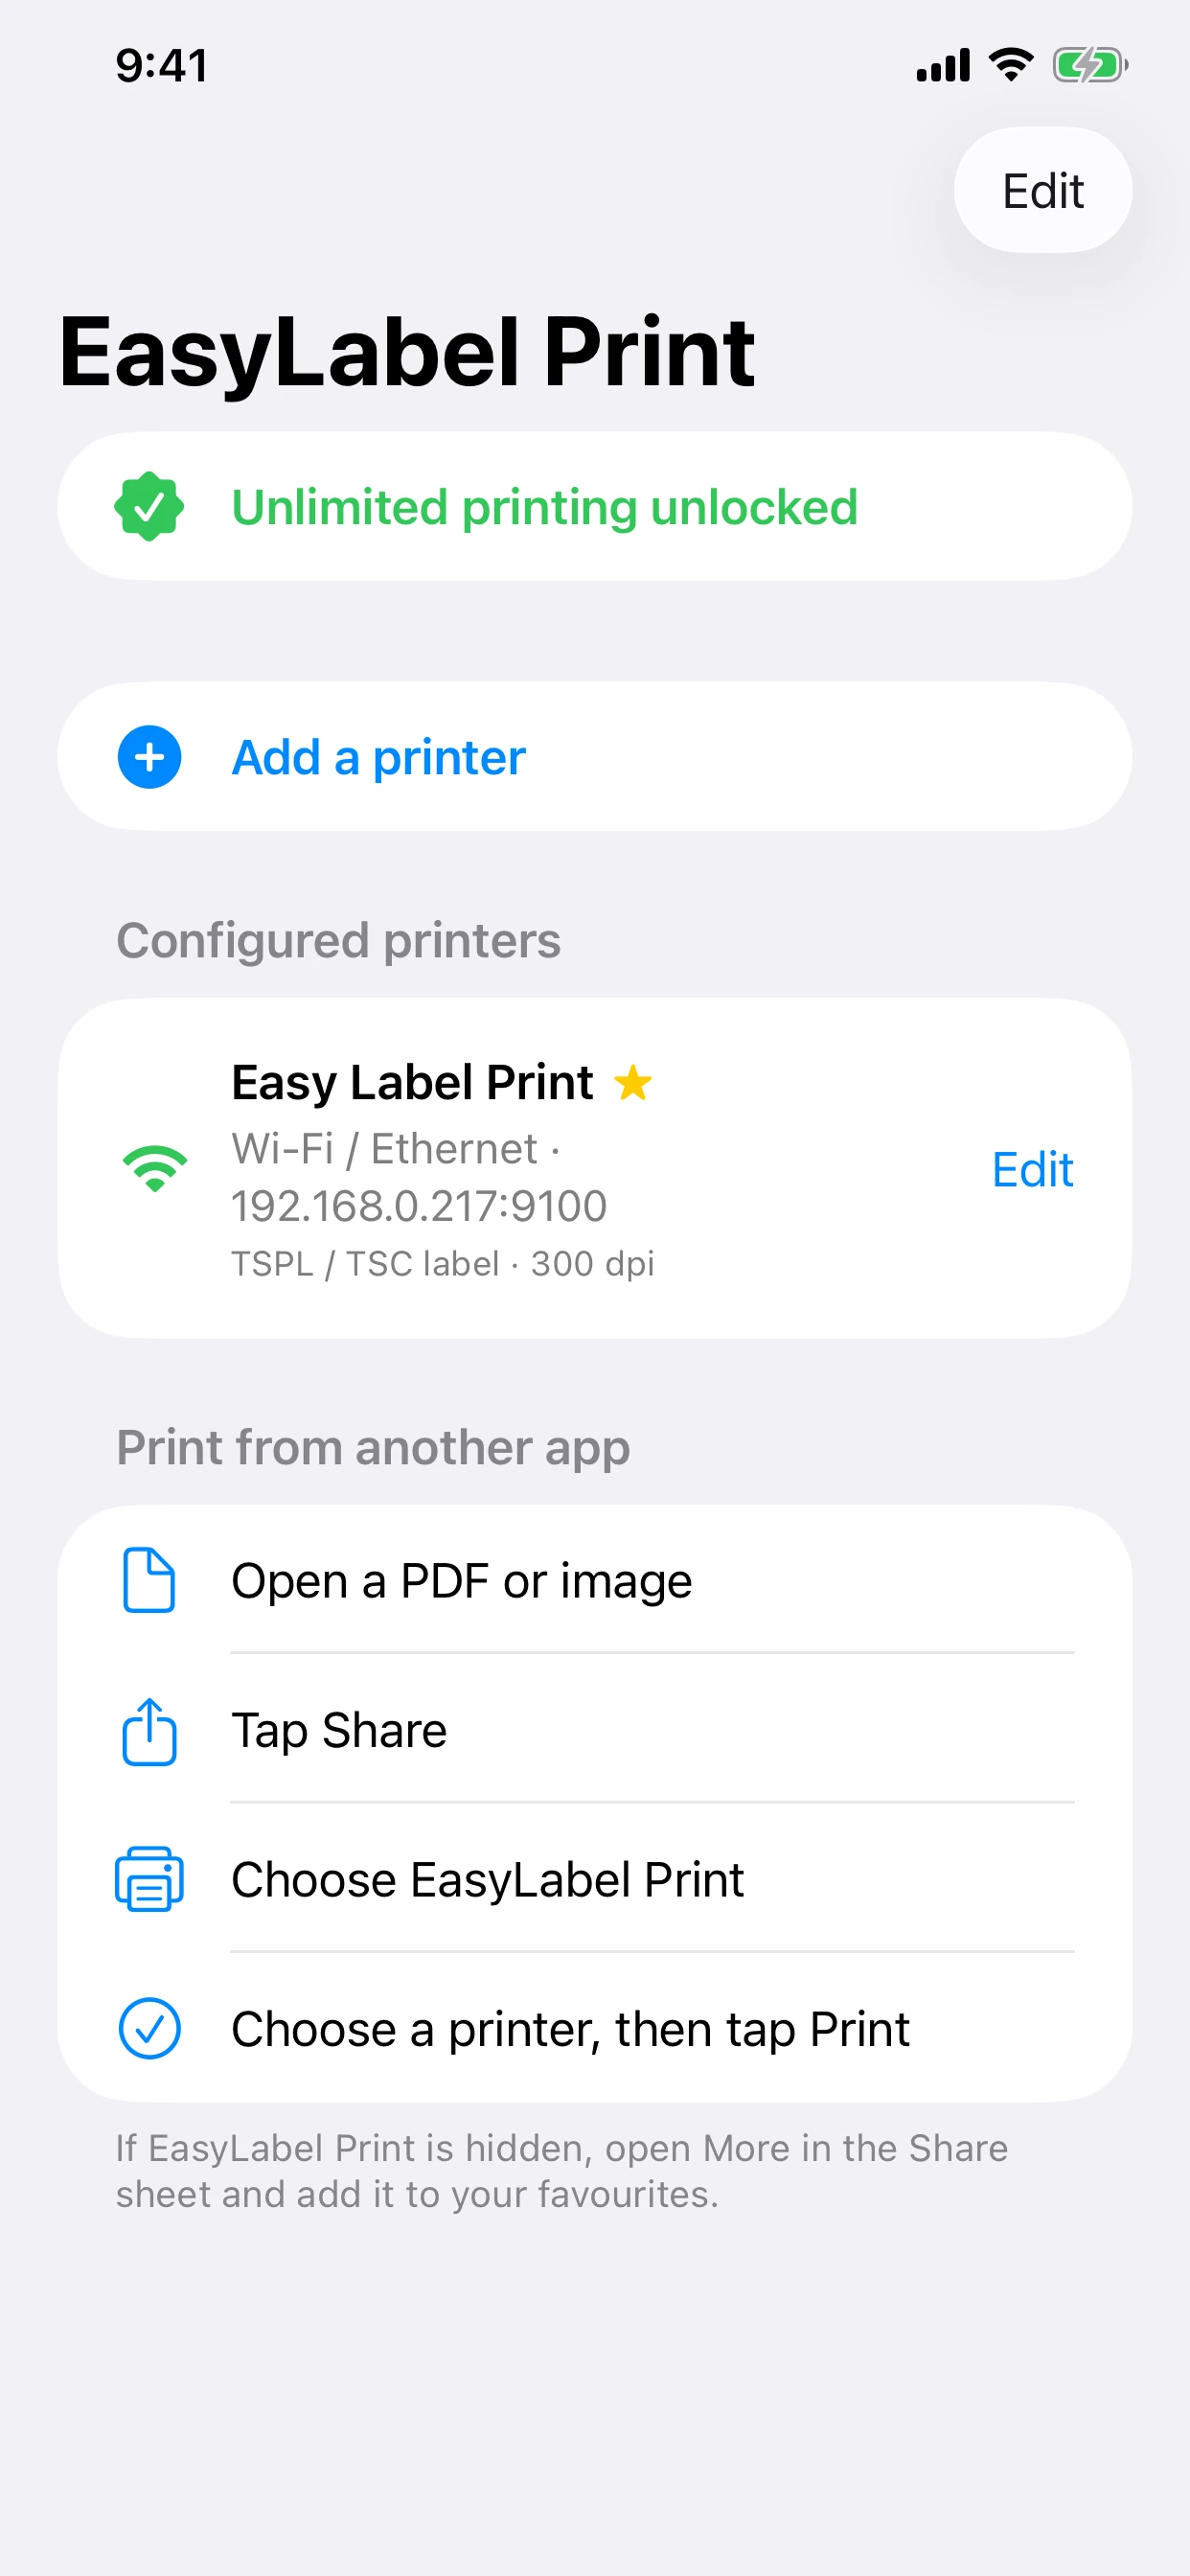
Wi-Fi printer configuration, screen by screen
These current iPhone captures show the complete path from a fresh install to a saved, tested printer.
Printer model validation catalogue
Compare Rongta, AUSPRINT, EasyLabelTech, and LabelRange wireless models by DPI, language, protocol, iOS connection, identification method, and evidence status.
Open the printer model catalogue →